Unlock the Secret to THE BEST Fluffy Buttercream Frosting
Every baker, whether novice or seasoned, dreams of a reliable, show-stopping frosting. A buttercream that transforms simple cakes and cupcakes into edible works of art, delivering a taste and texture that’s simply unparalleled. If you've ever found yourself sifting through countless recipes, hoping to find *the one* that consistently delivers a light, airy, and undeniably delicious result, your search ends here. Welcome to the definitive guide to mastering my favorite fluffy buttercream frosting – a recipe so good, it's been my trusted go-to for years, and a resounding reader favorite. What sets this particular buttercream apart from the myriad of options out there – from rich cream cheese frostings to delicate Swiss meringue buttercreams or sturdy royal icings – is its uncanny ability to turn out perfectly every single time. It's not just about the minimal, accessible ingredients; it's about a revolutionary technique that elevates simple components into a frosting masterpiece. Prepare to say goodbye to grainy, overly sweet, or stiff frostings. Instead, embrace a creamy, rich consistency with a sweet, buttery flavor that literally melts in your mouth. This isn't just a frosting; it's the perfect complement to virtually any cake, cupcake, or cookie, promising an indulgent experience that will have everyone asking for your secret.Essential Ingredients for My Favorite Fluffy Buttercream Frosting
While the magic truly happens in the technique, starting with the right ingredients is non-negotiable for achieving my favorite fluffy buttercream frosting. Quality matters, and a few strategic choices will make all the difference in the final product's flavor and texture.- Butter: The Foundation of Flavor and Texture
For this recipe, I advocate for a blend of part unsalted and part salted butter. This might seem unconventional, but there's a brilliant reason behind it. Adding granular salt directly to a frosting often results in tiny, undissolved bits that create an unpleasant texture. By using a portion of salted butter, you infuse the perfect amount of seasoning directly into the fat, ensuring a smooth, balanced flavor profile without any grittiness. Always make sure your butter is at a true room temperature – soft enough to make an indentation with your finger, but not melted or greasy. This is critical for optimal whipping. - Powdered Sugar (Confectioners' Sugar): For Smooth Sweetness
This superfine sugar is what gives buttercream its signature smooth texture. While many recipes insist on sifting, it's only strictly necessary if your powdered sugar is clumpy. If it is, definitely sift it to avoid any lumps in your finished frosting. Otherwise, you can incorporate it directly. The key here is proper measurement and gradual addition to ensure a homogenous mixture. - Heavy Cream: The Secret to Lightness and Creaminess
There are no substitutions for heavy cream in this recipe if you want truly stellar results. Its high fat content is essential for achieving that luxurious, light, and fluffy consistency. It not only adds richness but also helps to emulsify the frosting, preventing it from becoming too dense or stiff. Don't be tempted to use milk or half-and-half; they simply won't yield the same ethereal texture. - Vanilla Extract: Real Flavor is Paramount
Please, use real vanilla extract! The difference between genuine vanilla and imitation vanilla is profound and immediately noticeable. Real vanilla provides a complex, warm, and aromatic depth of flavor that imitation simply cannot replicate. It’s an investment that pays off in every delicious bite, truly elevating my favorite fluffy buttercream frosting from good to extraordinary.
The Game-Changing Technique: Mastering Fluffy Buttercream Perfection
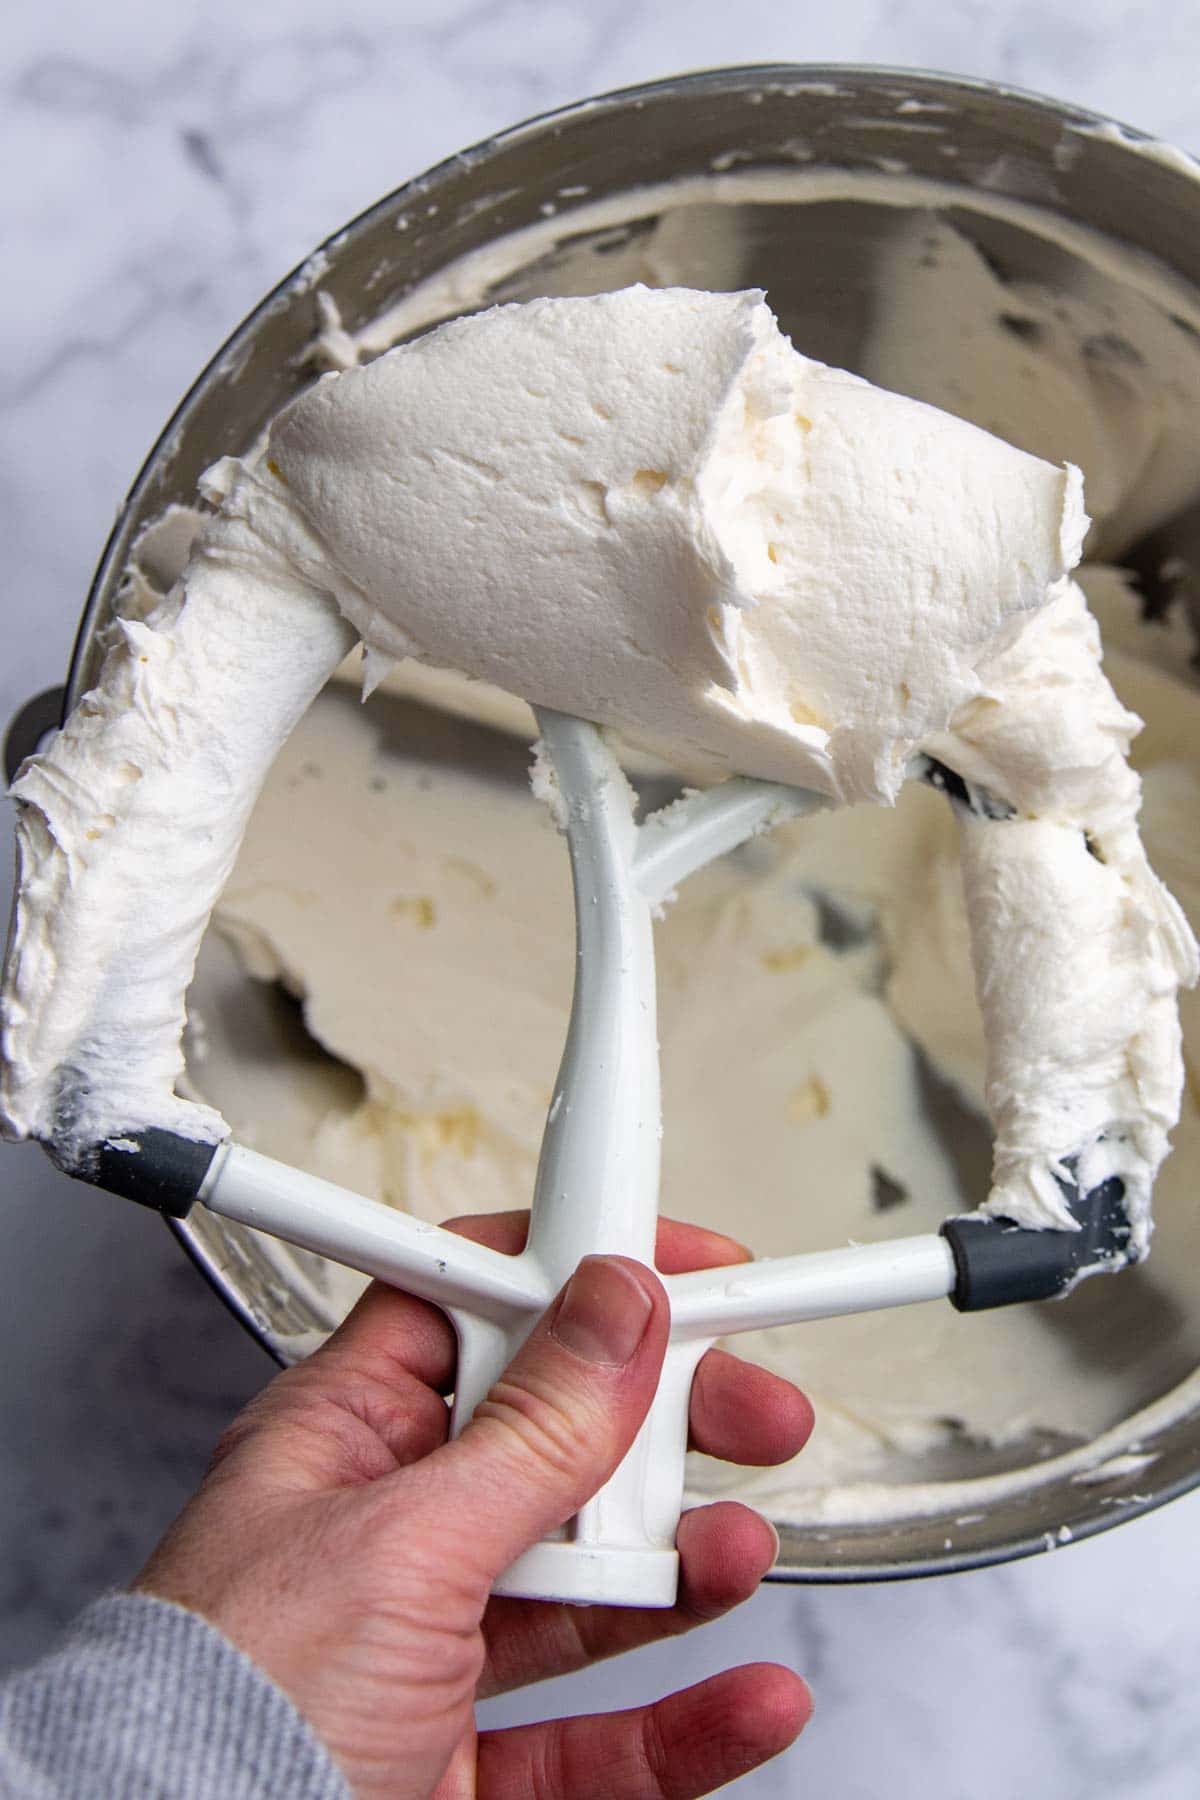
This is where the magic truly unfolds and what sets this recipe apart as THE BEST. The secret to achieving the quintessential light, airy, and incredibly fluffy texture of my favorite fluffy buttercream frosting lies not just in the ingredients, but profoundly in the method. It's a series of steps designed to maximize aeration and emulsification, resulting in a frosting that's unparalleled in richness and consistency. First, begin with your room-temperature butter in the bowl of an electric stand mixer fitted with the paddle attachment (or whisk attachment for even lighter results). This is arguably the most critical step: you need to whip that butter, and I mean *really* whip it. Turn your mixer to medium-high speed and let it go. The goal is to whip the butter until it transforms from its natural yellow hue to a very pale, almost white color, and is incredibly fluffy. This process typically takes 5-8 minutes, sometimes even longer, depending on your mixer and butter temperature.Pro Tip #1: Scrape, Scrape, Scrape!
During this initial whipping phase, you absolutely *must* frequently scrape down the sides and bottom of the bowl. Butter has a tendency to stick, and if you don't scrape, you'll end up with unevenly whipped butter and a less consistent frosting. Keep an eye on the shade of the butter; it needs to be visibly lighter, almost white, indicating that an immense amount of air has been incorporated. This aeration is the primary driver of the "fluffy" in my favorite fluffy buttercream frosting.
Pro Tip #2: The Second Whip for Ultimate Fluffiness
After the ingredients are blended, increase the mixer speed to medium (or medium-high again) and continue to beat the frosting. This second whipping stage is crucial for marrying all the ingredients, further aerating the mixture, and creating that signature light and fluffy texture. Again, scrape down the sides of the bowl frequently to ensure everything is evenly incorporated. You'll watch as the frosting lightens in color and volume, becoming incredibly airy and smooth. This stage can take another 3-5 minutes.
Beyond the Bowl: Tips for Perfect Application and Storage
Practical Application Tips:
- Temperature Control: Buttercream is sensitive to temperature. If your kitchen is very warm, the frosting might become too soft. If this happens, pop the bowl into the refrigerator for 10-15 minutes, then re-whip it briefly to restore its texture. Conversely, if it stiffens too much, let it sit at room temperature for a bit, then re-whip.
- For Piping: Fill your piping bag no more than two-thirds full to maintain control. Twist the top of the bag to seal it and apply even pressure.
- Smooth Finish: For a silky smooth cake finish, use an offset spatula to apply the frosting, then a bench scraper for perfectly level sides.
